
Table of Contents
Avantages de l’utilisation d’une bande 120LED/m DC12V/DC24V 5mm SMD2835 rétroéclairage TV LED LED flexible couleur unique
Un autre avantage de l’utilisation de la bande 120LEDs/m DC12V/DC24V 5mm SMD2835 rétroéclairage TV LED monochrome Flex LED est son efficacité énergétique. L’éclairage LED est connu pour sa faible consommation d’énergie, et cette bande LED ne fait pas exception. En utilisant une bande de 120 LED/m DC12 V/DC24 V 5 mm SMD2835 rétro-éclairage TV LED monochrome Flex LED, vous pouvez réduire considérablement votre consommation d’énergie et réduire vos factures d’électricité. Cela en fait une solution d’éclairage rentable pour les applications résidentielles et commerciales.
Comment installer une bande 120LEDs/m DC12V/DC24V 5mm SMD2835 rétroéclairage TV LED LED flexible couleur unique
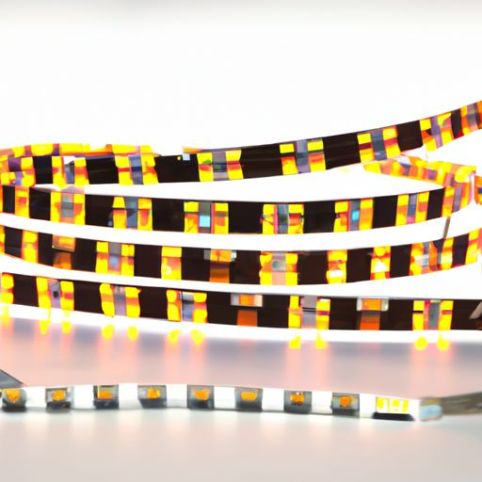
Bande 120LEDs/m DC12V/DC24V 5mm SMD2835 rétroéclairage TV LED monochrome Flex LED est un choix populaire pour ajouter un éclairage ambiant à votre téléviseur. Cette bande LED flexible est facile à installer et peut améliorer votre expérience visuelle en fournissant une lueur douce et uniforme derrière l’écran de votre téléviseur. Dans cet article, nous vous guiderons tout au long du processus d’installation de la bande 120LEDs/m DC12V/DC24V 5mm SMD2835 rétroéclairage TV LED monochrome Flex LED.
Avant de commencer le processus d’installation, assurez-vous de disposer de tous les outils et matériaux nécessaires. Vous aurez besoin de la bande LED, d’une alimentation (DC12V ou DC24V), d’un adaptateur secteur, d’un fer à souder, de soudure, d’une pince coupante et d’une règle ou d’un ruban à mesurer. Il est également utile d’avoir du ruban adhésif ou des Clips pour maintenir la bande LED en place.
La première étape de l’installation de la bande LED consiste à mesurer la longueur de la zone où vous souhaitez l’installer. Utilisez une règle ou un ruban à mesurer pour déterminer la longueur exacte de la bande LED nécessaire. Une fois que vous avez les mesures, coupez la bande LED à la longueur appropriée à l’aide d’une pince coupante. Assurez-vous de couper la bande aux points de coupe désignés pour éviter d’endommager les LED.
Ensuite, vous devrez souder les fils aux bornes positives et négatives de la bande LED. Utilisez un fer à souder pour fixer solidement les fils aux bornes. Assurez-vous de revérifier la polarité des fils pour vous assurer que la bande LED s’allumera correctement lorsqu’elle sera connectée à l’alimentation.
Après avoir soudé les fils, connectez la bande LED à l’alimentation. Si vous utilisez une alimentation DC12V, assurez-vous de connecter le fil positif à la borne positive de l’alimentation et le fil négatif à la borne négative. Si vous utilisez une alimentation DC24V, suivez les mêmes étapes mais avec la tension appropriée.
Une fois la bande LED connectée à l’alimentation, testez-la pour vous assurer qu’elle fonctionne correctement. Branchez l’adaptateur secteur et allumez l’alimentation. La bande LED doit s’allumer, émettant une lueur douce et uniforme. Si la bande LED ne s’allume pas, revérifiez les connexions et assurez-vous que la polarité est correcte.
Après avoir testé la bande LED, il est temps de l’installer derrière votre téléviseur. Utilisez du ruban adhésif ou des clips pour fixer la bande LED en place, en vous assurant qu’elle est positionnée uniformément derrière l’écran. Évitez de placer la bande LED trop près des bords du téléviseur pour éviter toute fuite de lumière.
Une fois la bande LED bien en place, asseyez-vous et profitez de l’expérience visuelle améliorée offerte par l’éclairage ambiant. La douce lueur de la bande LED créera une atmosphère plus immersive tout en regardant des Films ou en jouant à des jeux vidéo sur votre téléviseur.
En conclusion, l’installation de la bande 120LEDs/m DC12V/DC24V 5mm SMD2835 rétroéclairage TV LED Single Color Flex LED est une solution simple et moyen efficace d’améliorer votre expérience télévisuelle. En suivant les étapes décrites dans cet article, vous pourrez facilement installer la bande LED derrière votre téléviseur et profiter des avantages de l’éclairage ambiant. Alors pourquoi attendre ? Améliorez la configuration de votre téléviseur dès aujourd’hui avec une bande de 120 LED/m DC12 V/DC24 V 5 mm SMD2835 rétro-éclairage LED TV LED flexible couleur unique.
How to Install Strip 120LEDs/m DC12V/DC24V 5mm SMD2835 Backlight TV LED Single Color Flex LED
Strip 120LEDs/m DC12V/DC24V 5mm SMD2835 backlight TV LED Single Color Flex LED is a popular choice for adding ambient lighting to your television. This flexible LED strip is easy to install and can enhance your viewing experience by providing a soft, even glow behind your TV screen. In this article, we will guide you through the process of installing Strip 120LEDs/m DC12V/DC24V 5mm SMD2835 backlight TV LED Single Color Flex LED.
Before you begin the installation process, make sure you have all the necessary tools and materials. You will need the LED strip, a power supply (either DC12V or DC24V), a power adapter, a soldering Iron, solder, wire cutters, and a ruler or measuring tape. It is also helpful to have some Adhesive tape or clips to secure the LED strip in place.
The first step in installing the LED strip is to measure the length of the area where you want to install it. Use a ruler or measuring tape to determine the exact length of the LED strip needed. Once you have the measurements, cut the LED strip to the appropriate length using wire cutters. Be sure to cut the strip at the designated cut points to avoid damaging the LEDs.
Next, you will need to solder wires to the positive and negative Terminals on the LED strip. Use a soldering iron to attach the wires securely to the terminals. Make sure to double-check the polarity of the wires to ensure that the LED strip will light up properly when connected to the power supply.
After soldering the wires, connect the LED strip to the power supply. If you are using a DC12V power supply, make sure to connect the positive wire to the positive terminal on the power supply and the negative wire to the negative terminal. If you are using a DC24V power supply, follow the same steps but with the appropriate voltage.
Once the LED strip is connected to the power supply, test it to make sure it is working correctly. Plug in the power adapter and turn on the power supply. The LED strip should light up, emitting a soft, even glow. If the LED strip does not light up, double-check the connections and make sure the polarity is correct.
After testing the LED strip, it is time to install it behind your TV. Use adhesive tape or clips to secure the LED strip in place, making sure it is positioned evenly behind the screen. Avoid placing the LED strip too close to the edges of the TV to prevent any light leakage.
Once the LED strip is securely in place, sit back and enjoy the enhanced viewing experience provided by the ambient lighting. The soft glow of the LED strip will create a more immersive atmosphere while watching movies or playing video games on your TV.
In conclusion, installing Strip 120LEDs/m DC12V/DC24V 5mm SMD2835 backlight TV LED Single Color Flex LED is a simple and effective way to enhance your TV viewing experience. By following the steps outlined in this article, you can easily install the LED strip behind your TV and enjoy the benefits of ambient lighting. So why wait? Upgrade your TV setup today with Strip 120LEDs/m DC12V/DC24V 5mm SMD2835 backlight TV LED Single Color Flex LED.